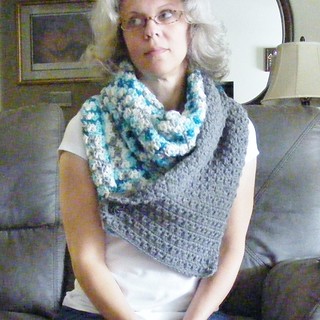
 Crocheted Rosa
MC (Mixed Cluster): yo, insert hook into first st as indicated, yo, draw loop through, yo, draw through 2 loops, skip 1 st, [yo, insert hook into next st, yo, draw loop through] twice all in the same st, yo, draw through all 6 loops on hook.
J hook
2 skeins Bernat Super Value (Winter Sky)
.5 skein Bernat Super Value (True Gray)
button of your choice
Measurements: 11.5in x 79.5in
NOTE: if the button can slide between the stitch pattern the button hole in row 145 does not need to be made.
Chain 36
Row 1 Skip 2 ch (count as 1 sc), sc across in each stitch, turn
Row 2 2 ch (count as hdc), 1 MC inserting hook into 1st and 3rd stitches, 1 ch, * 1MC inserting hook into second stitch of prior MC first, 1ch, rep from * ending last MC in last stitch (not turning chain), chain 1 then hdc in last stitch as well, turn
Row 3 1 ch, skip 1 st, sc across in each stitch including top of tch, turn
Repeat Rows 2 and 3 52 times
Repeat Row 2
Change colors
Row 108 join new yarn in hdc with a sc, sk st, sc across, turn
Repeat Row 2 and 3 18 times
Repeat Row 2
Row 145 1 ch, skip 1st stitch, sc in next 4 stitches, ch 3 (or # stitches just smaller than the button you have chosen), skip the same number of stitches, sc across, turn
Repeat Row 2 and 3 twice (work in the chain stitch of Row 145 as if they were normal stitches)
Finish off, weave in ends.
Sew the button on the opposite side and corner as the button hole was placed, approximately 3 inches in from the edge.
For more pictures check out my Ravelry page for this project. If you have any questions or find any of this pattern confusing please let me know so that I can clarify for you and others. Thanks so much! And thank you Anne for the amazing inspiration!