I used Wool-ease Thick and Quick so it's really lovely and warm, but the pattern could be easily adjusted to work with any yarn. The finished product was 5.5 inches wide and 20 inches long. Again, work it longer if needed, and use a smaller hook for a thinner head warmer. You can even leave off the cinching if you wish, placing the seam in the back. It's all good. Now, to the pattern:

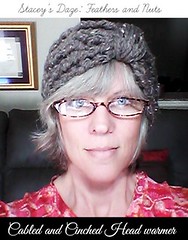
Cabled and Cinched Head warmer
Notes: ignore the turning chains completely;
fpdc: front post doublr crochet; bpdc: back post double crochet; hdc: half double crochet;
leave a long tail when you create the chain, this will be used to seam the two ends;
Hook: K (6.5)
Row 1: chain 14
Row 2: in second stitch from hook dc and continue across, chain 2 (12 dc)
Row 3: fpdc, fpdc, hdc, hdc, fpdc, fpdc, fpdc, fpdc, hdc, hdc, fpdc, fpdc, chain 2
Row 4: bpdc, bpdc, hdc, hdc, (skip 2 stitches) bpdc, bpdc, (go back to the 2 skipped stitches) bpdc, bpdc, hdc, hdc, bpdc, bpdc, chain 2
Row 5: repeat Row 3
Row 6: bpdc, bpdc, hdc, hdc, bpdc, bpdc, bpdc, bpdc, hdc, hdc, bpdc, bpdc, chain 2
Repeat Rows 3-6 7 times
Fasten off, leave a tail.
With the long tail from the chain seam the two short ends together to form a circle.
With the tail from the last row cinch the head warmer. I did this by pulling the yarn up after the first two rows of cables, down before the cable braid, up after the cable braid, down before the last two rows of cable, and back up on the edge of the warmer, tighten so it cinches together, and then knot.
At this point wrap the yarn around the cinched spot to your desired thickness.

This is my first time writing a cabled pattern, so please let me know if this doesn't make sense. Thank you so much.